Note:
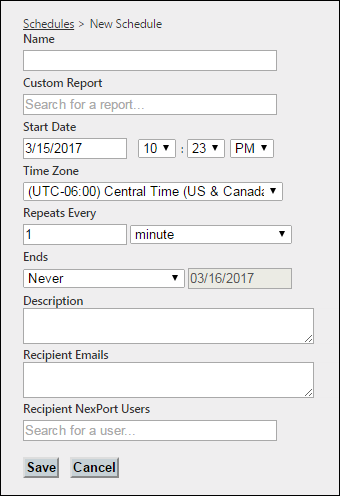
Type the first few characters of the custom report that you need to schedule. NRS populates the matching results. You can view all reports that you created and any public reports for your organization.
Note:
The start date is always the current date, but can be set to any other date in the future.
- Type 1 or any numerical value and select minute, hour, or day as a time interval to run the report.
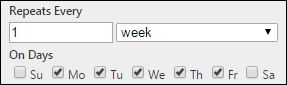
- Type 1 or any numerical value and select week as a time interval, under the On Days area, check the boxes next to each day you need to run the report.
-
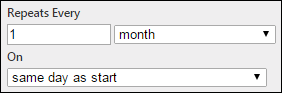
- Type 1 or any numerical value and select month as a time interval, under the On area, click same day as start or first day of month or last day of month to run the report. The same day as start selection means that the report runs on the same day as when you select the schedule to start. The first day of month means that the report runs on the first day of the month at the scheduled time. The last day of month means that the report runs on the last day of the month at the scheduled time.
-
- Type 1 or any numerical value and select year as a time interval, under the Ends area, select the end date to stop running the report.
- Click Never, the schedule is repeated after time interval selected and does not end.
- Click On, the date picker box is enabled. Select the end date to stop running the report.
Note:
You can separate the email addresses by comma (,) or a semi-colon (;).
Note:
Type the first few characters of the user to whom you need to send the scheduled reports. NRS populates the matching results. The report sent to each NexPort Campus users’ is filtered based on the permission of the user.
Click the ![]() icon to remove NexPort user.
icon to remove NexPort user.